See how provide internet in your farm in just few steps
Step by Step
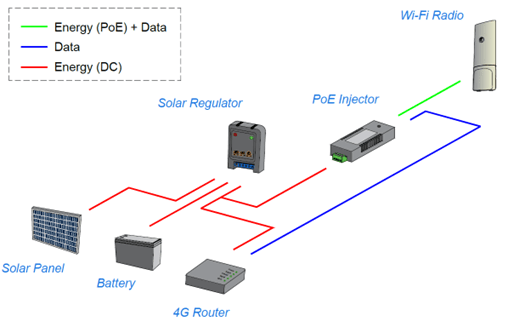
To build a communication pod that is directly connected to the internet, the following materials are required:
- Wi-Fi radio: This device is responsible for transmitting and receiving data wirelessly. It allows devices to access the internet through Wi-Fi signals. In the project, the equipment installed and evaluated was Cambium Wi-Fi 6 XV2-2T0 with omnidirectional antennas.
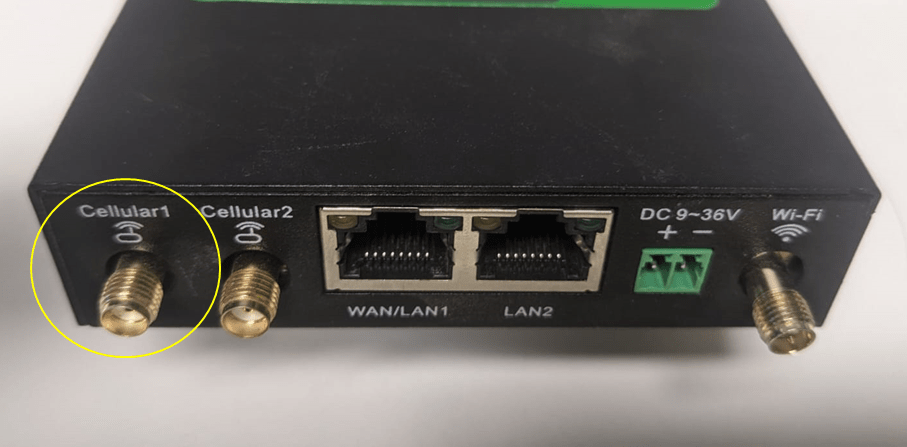
- 4G Router: it receives data from the Wi-Fi radio and directs it to the internet. It will also provide the IP addresses of all devices installed in the field. The equipment utilized was an Inhand IR302 router 4G/3G
- solar panel 12V x 160W.
- solar regulator MPPT 20A;
- battery 12V x 70A;
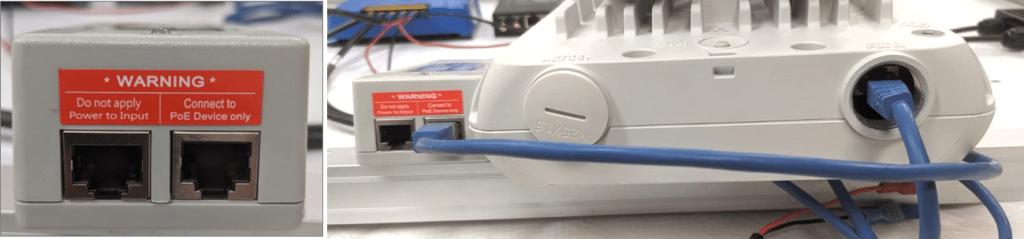
- PoE injector 802.3at Input 10-15VDC with 3.6A / Output 56VDC with 0.625A;
- car fuse of 10A with case;
- Ethernet cable cat. 6 (as long as the distance between Cambium and the PoE injector in the box containing the equipment in the communication pod;
- Ethernet cable cat 6 to connect the 4G router and the PoE injector;
- Electric cable 1.5mm2 20A red and black (AS/NZS 3008);
- Waterproof plastic box;
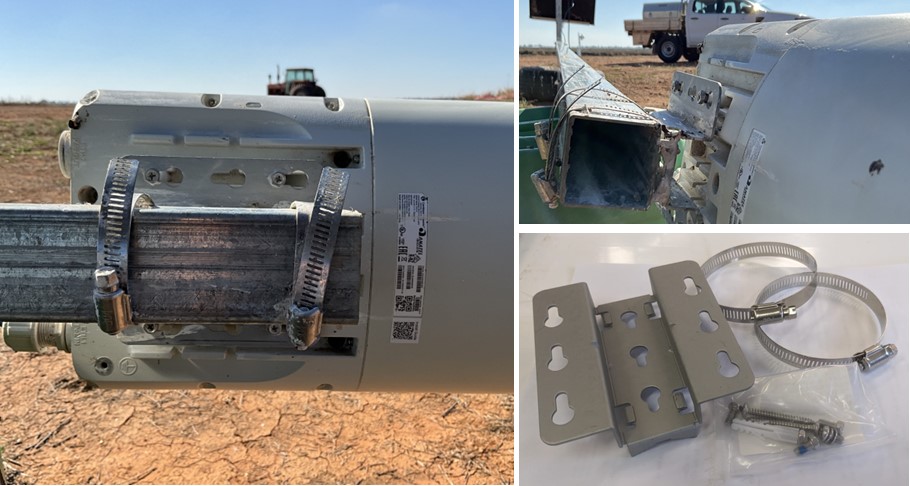
- 5m metallic pole to hold the Cambium and the box;
- Truck tire filled with concrete (base of the pole).
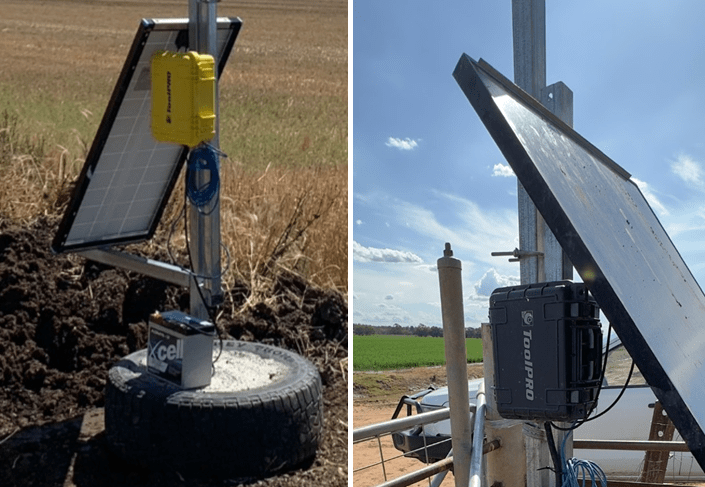
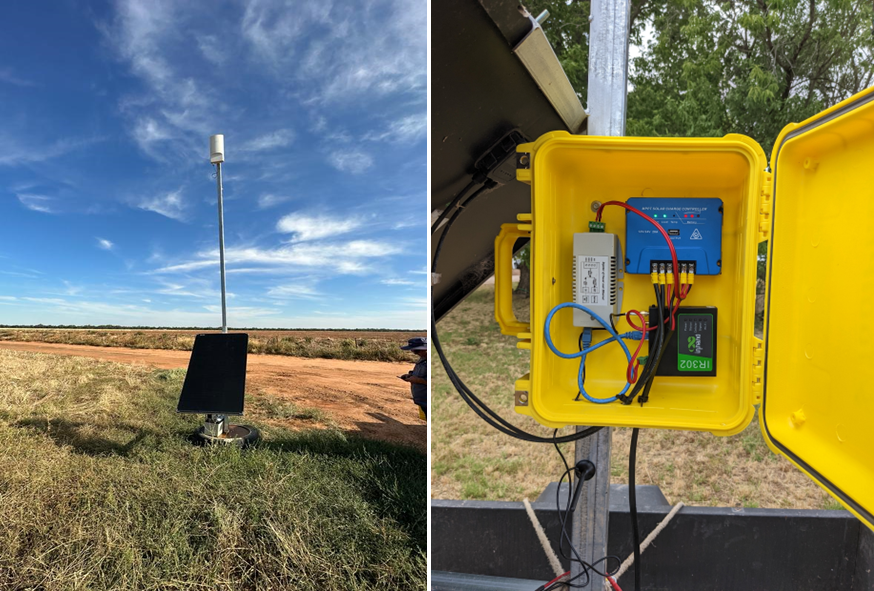
Step 1: Fix the solar panel securely onto the communication pod. Place the battery on top of the tire to add weight to the base. See also how waterproof box can be installed.
Step 2: Prepare a waterproof box to house the equipment. Create holes in the box to allow cables from the solar panel, battery, ethernet cable for the Wi-Fi radio, and cable for the 4G antenna to pass through. The 4G antenna will be connected to the 4G router. Dimensions of the box used in the field tests are: 330mm x 250mm x 160mm. Optionally there is also pods with waterproof boxes of 270mm x 220mm x 180mm.
Step 3: Attach the Wi-Fi radio in the edge of the metallic pole. Use the brackets included in the device to attach it.
Step 4: (optional) Install a fuse case and a 10A car fuse in the positive battery cable for added safety.
Step 5: Connect the positive and negative cables of the solar panel to the respective connectors on the solar regulator. The solar regulator’s first connector on the left side is usually designated for the solar panel connection. Also connect the battery cable to the solar regulator, ensuring the positive and negative cables are connected correctly

Step 6: Prepare two pairs of cables. One pair will connect the PoE injector to the load connectors on the solar regulator, and the other pair will connect the 4G router to the same load connectors.
Step 7: Connect the PoE injector and the 4G router to the load connectors on the solar regulator.
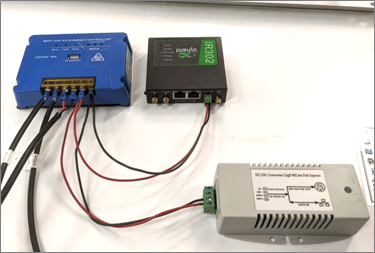
Step 8: Connect the 4G antenna to the labelled “4G” interface on the router.
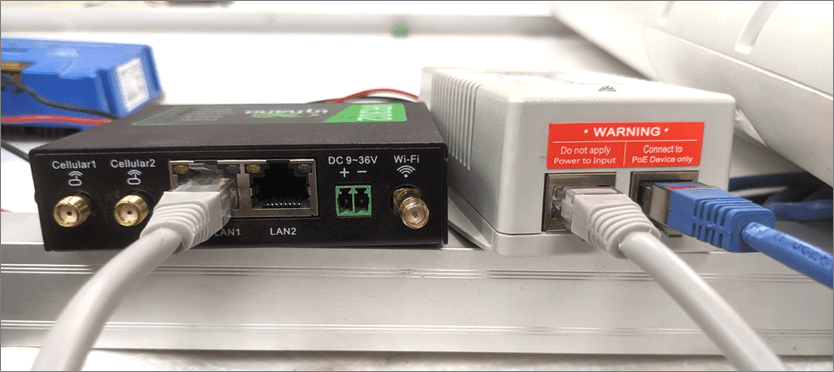
Step 9: Connect a long Ethernet cable to the ethernet 1 interface on the Wi-Fi radio. Connect the other end of the cable to the Ethernet interface of the PoE injector, which may be labelled as “PWR PoE,” “OUT,” or “Connect PoE device only.”
Step 10: Use a short Ethernet cable to connect any interface on the 4G router to the ethernet interface of the PoE injector (not the PoE ethernet interface).
Step 11: Arrange the 4G router, solar regulator, PoE injector, and other equipment inside the waterproof box. Fix the box onto a metallic pole, ensuring it is at a height of minimum 1.0m from the top of the tire.

Leave a comment