To configure the communication pod, you will need to configure two devices – the Cambium radio and the 4G router. Follow the steps below to configure the 4G router and establish a solid connection with the internet.
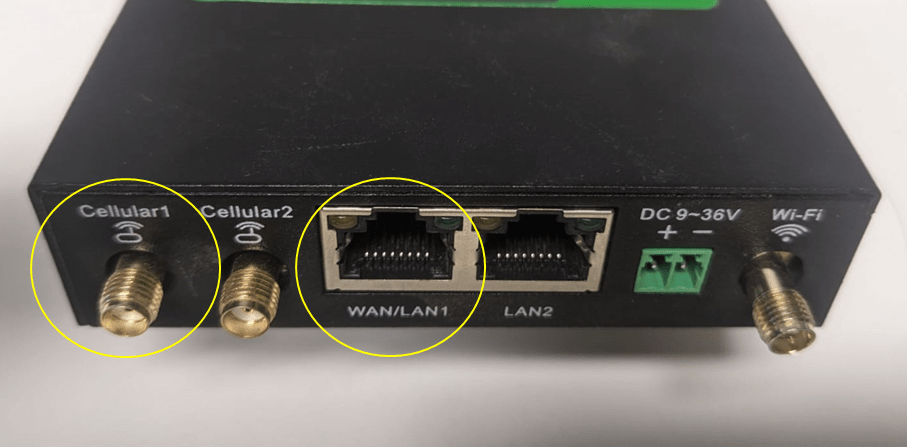
Step 1: Install the 4G antenna in the Cellular 1 aerial interface. And connect your computer into the WAN/LAN1 interface.
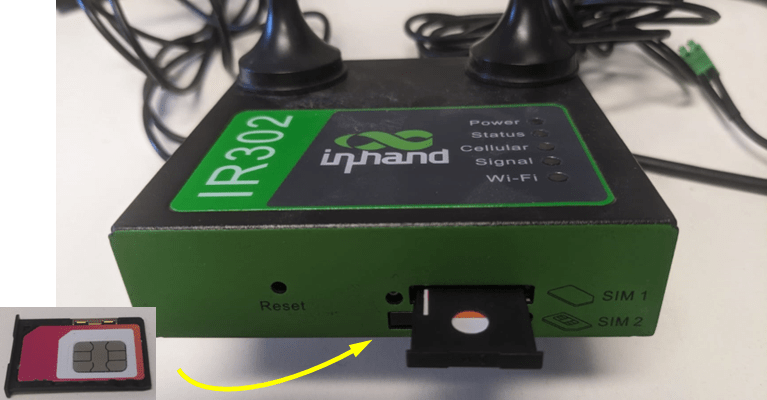
Step 2: Release the SIM 1 tray to install the 4G sim card (any Australian operator). Press the push button highlighted in the picture for SIM 1.

Step 3: insert the SIM card in the tray and put the tray in the router again. Make it sure you insert the tray in the right position.
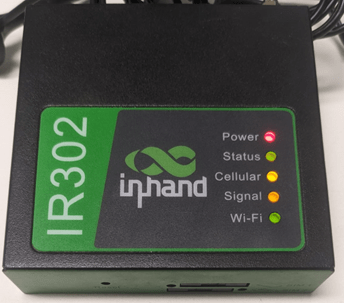
Step 4: Powe up the equipment. Connect the power supply that came with the device and connected in in DC 9~36V interface. When equipment will be ready, the led configuration will be as follows in Figure 4. The cellular led must be solid yellow, as well as Signal led. Status must be green. The Wi-Fi led will be blinking during normal operation.
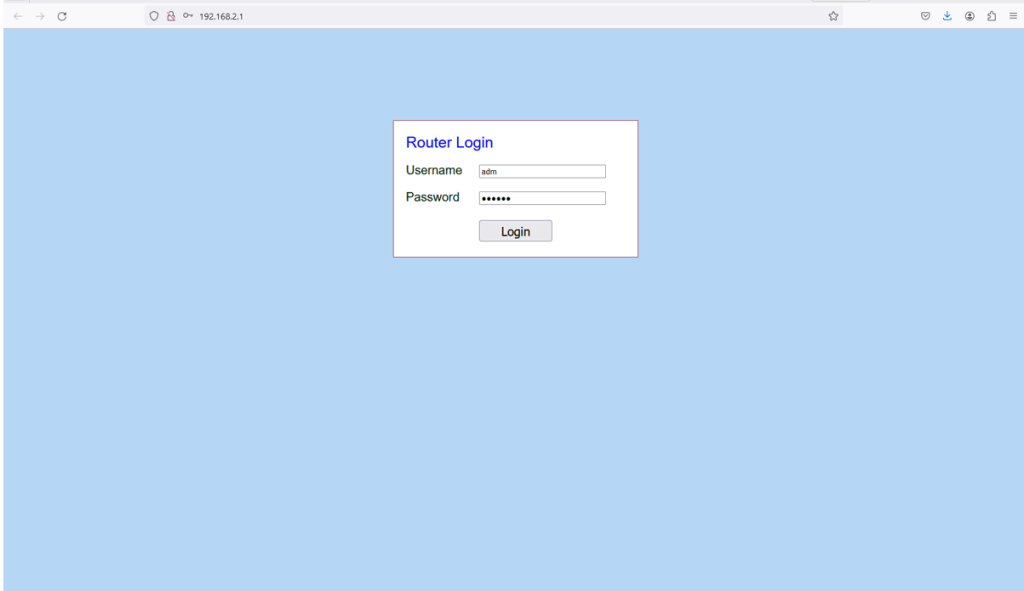
Step 5: Once your computer be connected into the router, it will receive an IP address automatically (192.168.2.x/24). Access the 4G router configuration through http://192.168.2.1. The login will be required: username adm and password is 123456.
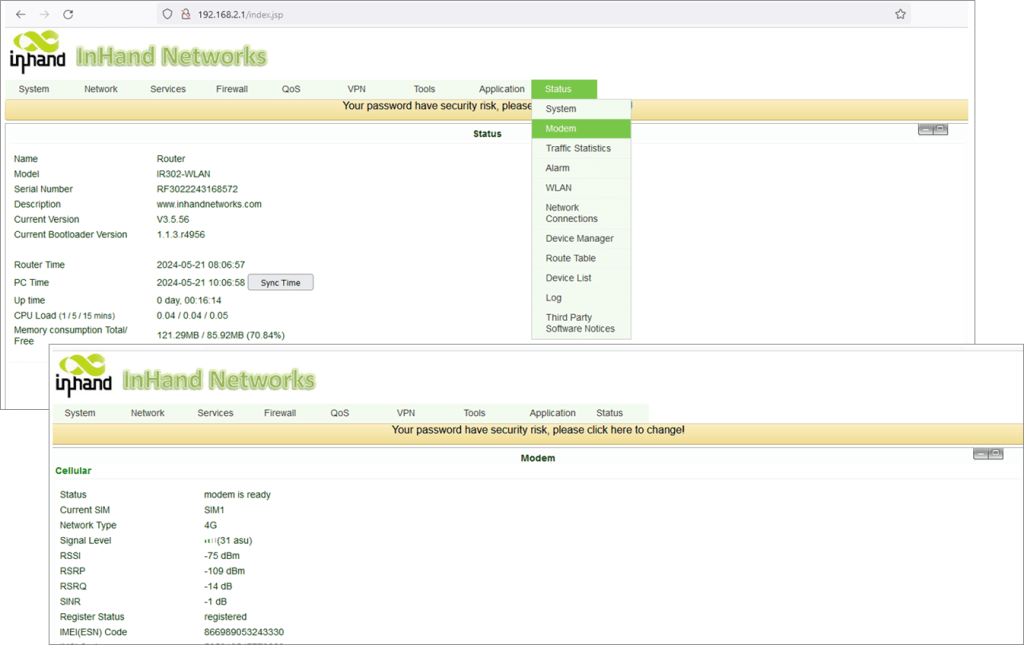
Step 6: In the main screen access the menu Status -> Modem . If the SIM card is properly installed in the equipment and the 4G network is available, you should read the message “modem is ready” in status
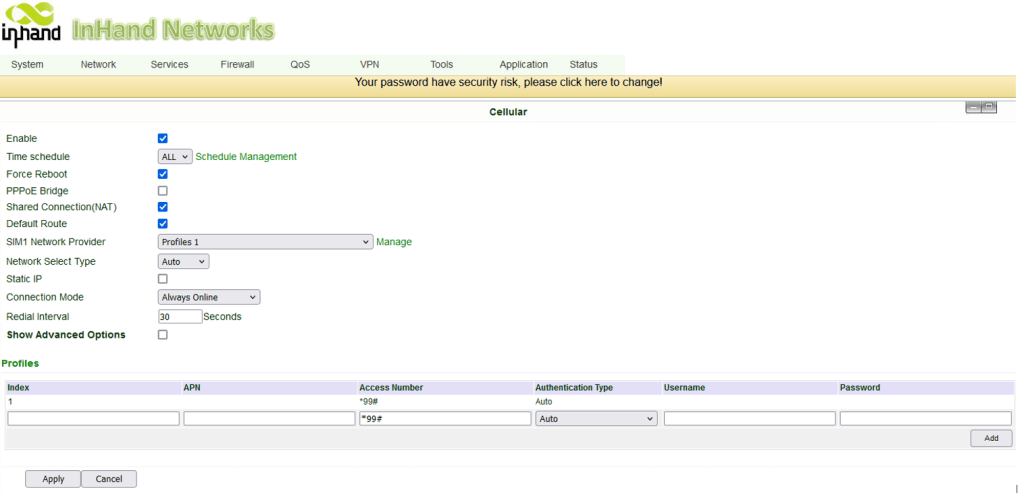
Step 7: In Network -> Cellular menu configure the cellular interface according to information depicted in the picture below. The Profile depicted is related to Telstra network. Please, check your operator profile configuration. To configure just complete the fields and click in Add. After all configuration is done click in Apply.
Step 8: Once configured, you can be able to access the Internet using the computer connected into the router. Just open the browser of your preference and access any website.
Additionally, you can configure the 4G router to provide Wi-Fi access in a short-range distance, but useful for future maintenance. To configure the Wi-Fi network in the router, access Network -> WLAN in the menu and configure the network as depicted in the picture below. In the example the channel selected is 3, and the SSID (name of the network you will see in your computer or smartphone) is called maintenance. You choose your password. Click on apply and install the Wi-Fi antenna in the Wi-Fi interface in the rear of the equipment.


Leave a comment