This tutorial will guide you step by step on how to configure the Cambium Wi-Fi radio to make it available Wi-Fi in your field.
To configure the communication pod, you will need to configure two devices – the Cambium radio and the 4G router. Follow the steps below to configure the Cambium radio and establish a wireless network called closed for field devices to access the internet.
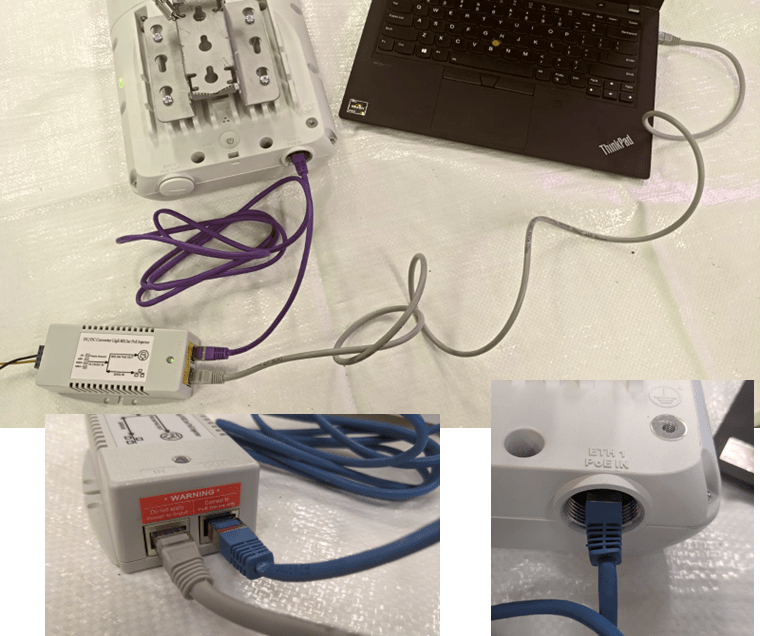
Step 1: Once equipment is built, connect your computer into the data interface of the PoE injector. Keep the router turned off for the following steps.
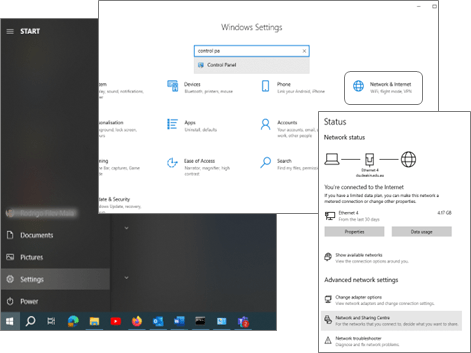
Step 2: To access Cambium for the first time you need to connect in the equipment default IP address: 192.168.0.1. To do that configure an IP address in your computer. For Windows 10 and above access: Settings > Network and Internet > Network and sharing Centre
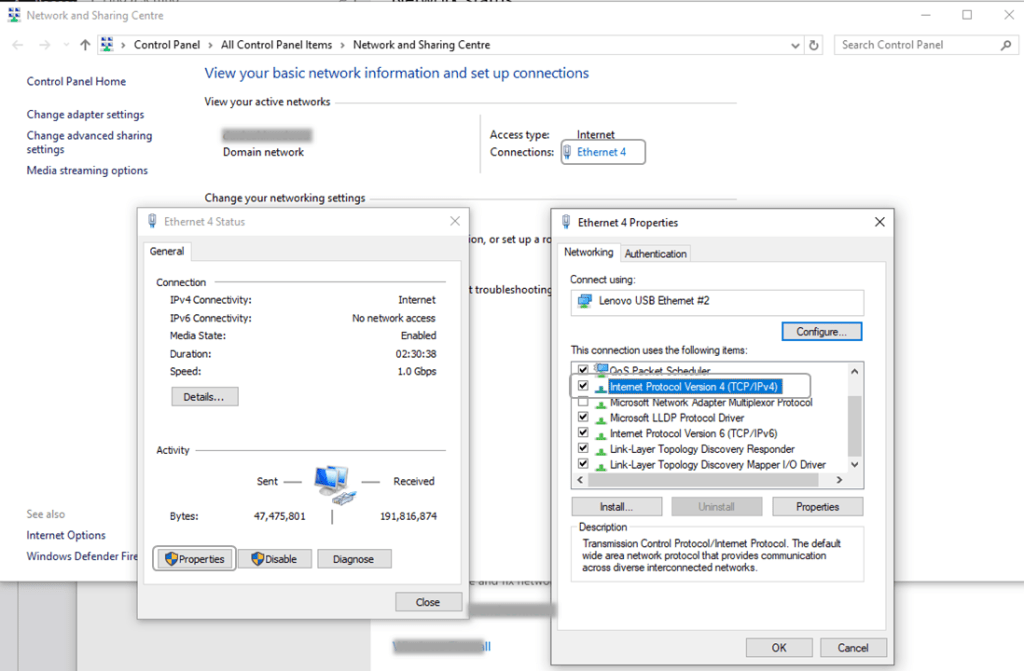
Step 3: Select the Ethernet interface of your computer, select Properties and double click in “Internet Protocol Version 3 (TCP/IPv4)”
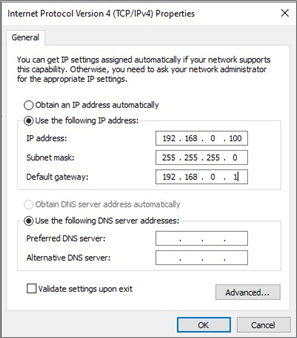
Step 4: Once clicked in TCP/IPv4 option, configure the following IP address as indicated in picture below:
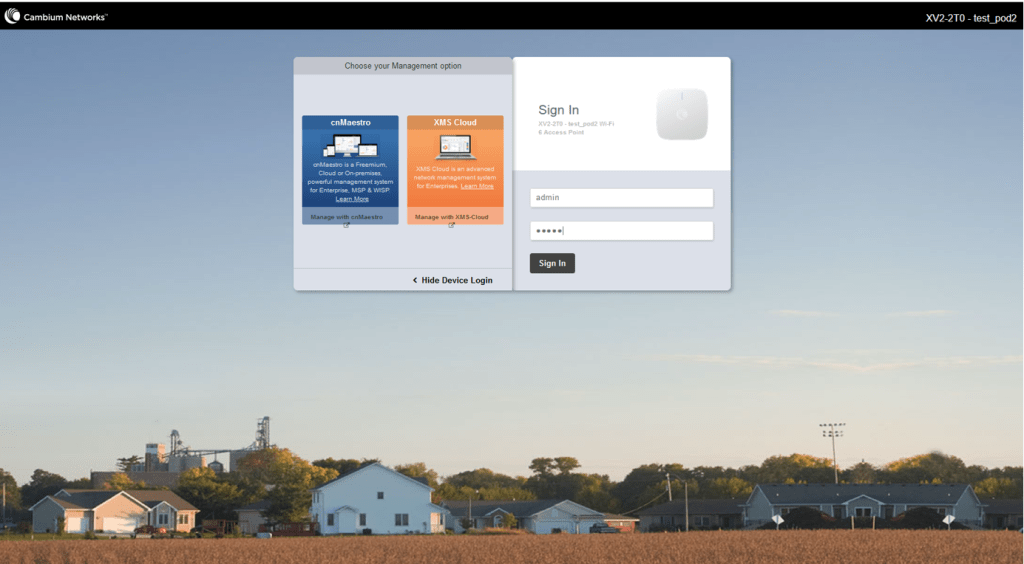
Step 5: Using any browser access the IP address 192.168.0.1 (cambium default IP address). Select “Skip to Device Login” and use username admin and password admin.
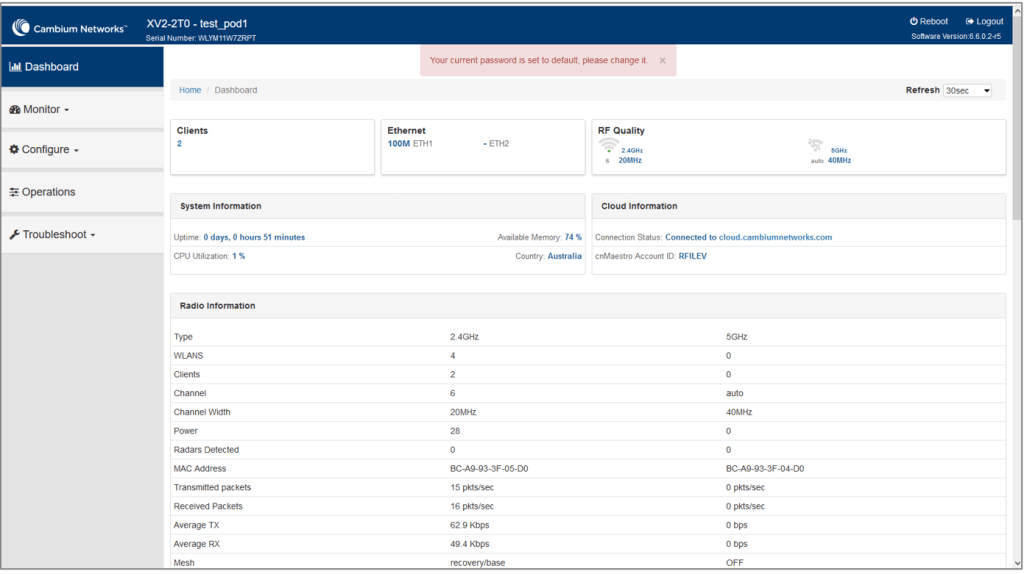
Step 6: Once logged, the dashboard will be displayed when you can see general information about the equipment. Always check the software version (top right corner). If it is below version 6.6.0.2, please refer to the Update software version if this tutorial (can be done after equipment configuration).
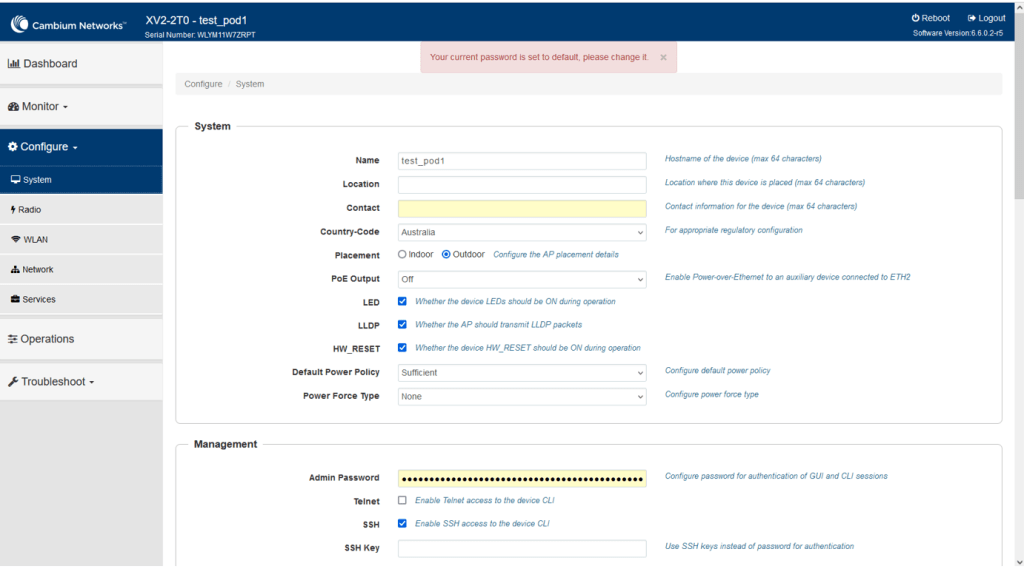
Step 7: Select: Configure -> System option give a device name, Select Country-Code as Australia, placement as Outdoor. Go to next step.
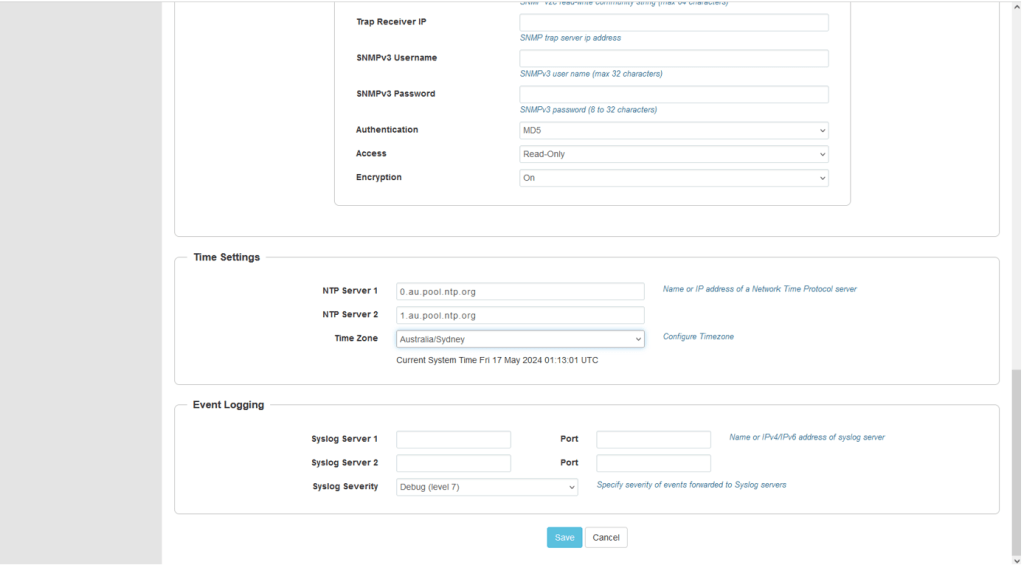
Step 8: In the same screen configure the time settings with the same NTP Servers and time zone of the and click Save. Do not leave that page without saving the configurations.
Step 9: In Configuration -> Radio session, select Radio 1 (2.4GHz). Just change the Candidate Channels to Specific and define channels 1, 6 and 11 as depicted in the following picture. Save the configuration.
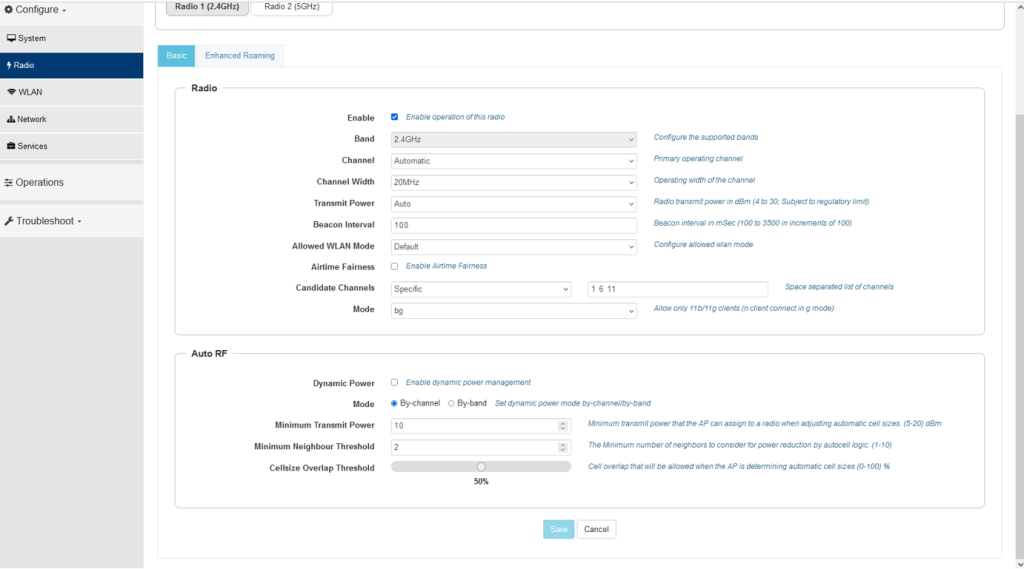
Step 10: In radio 2 (5GHz) deactivate the radio (de-select Enable option on the top of page). Save the configuration.
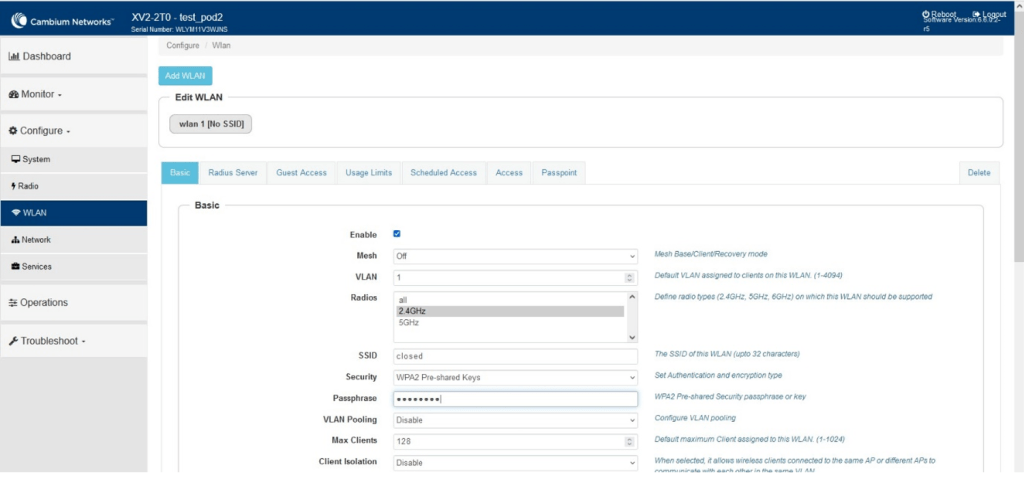
Step 11: Once it is done it is time to configure the wireless network where the field equipment will connect. The SSID will be named closed. Select Configure -> WLAN and click in Add WLAN. In the pop up just click in OK.

Step 12: In the next screen configure SSID as closed, select radio in 2.4GHz, Security as WPA2-Pre-shared Keys and Passphrase (in this example deakin123). Click in Save (end of the page, not shown in the picture).
Step 13: Disconnect your computer and connect the router in the same interface. Power up the router and the communication pod is ready to run.
How to upgrade Cambium firmware
Usually the Cambium Wi-Fi radio comes with an older software version and it is necessary to update the software equipment. In order to update the equipment, please download the proper version of the software for XV2-2T0 from https://support.cambiumnetworks.com and follow the next steps:
Step 1: login in the website (or register for a new user)
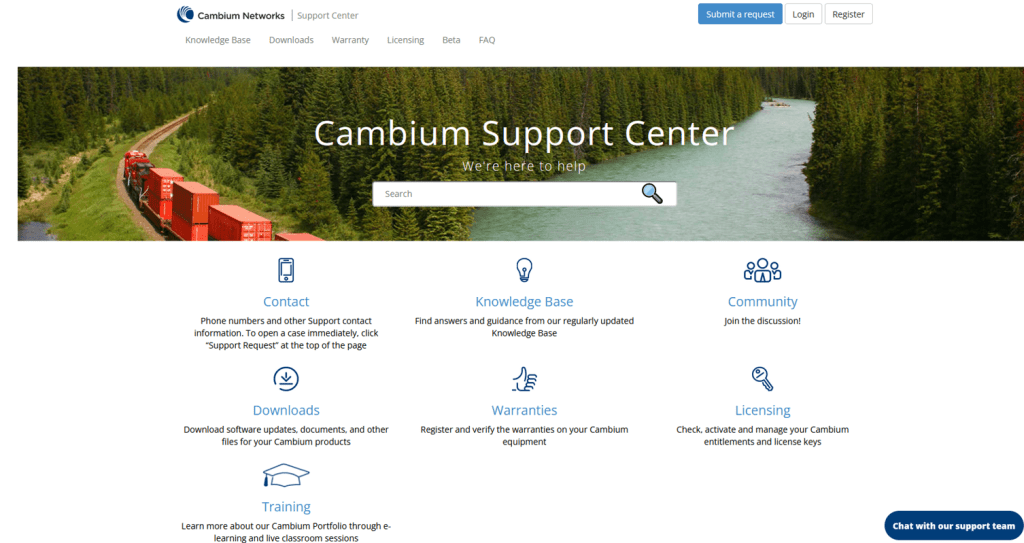
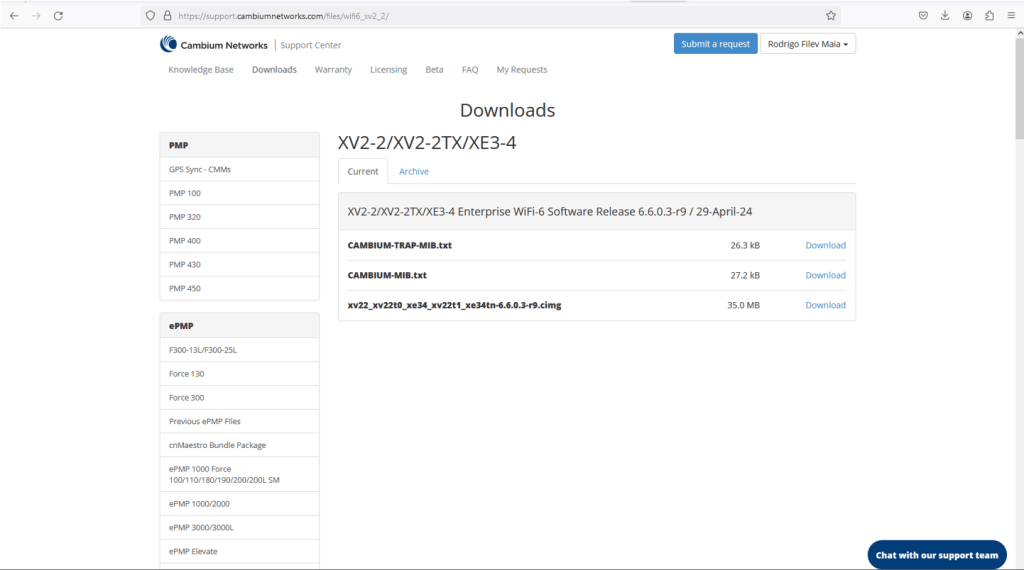
Step 2: Once logged, click in Downloads. You will see at the left side a menu with all Cambium equipment.
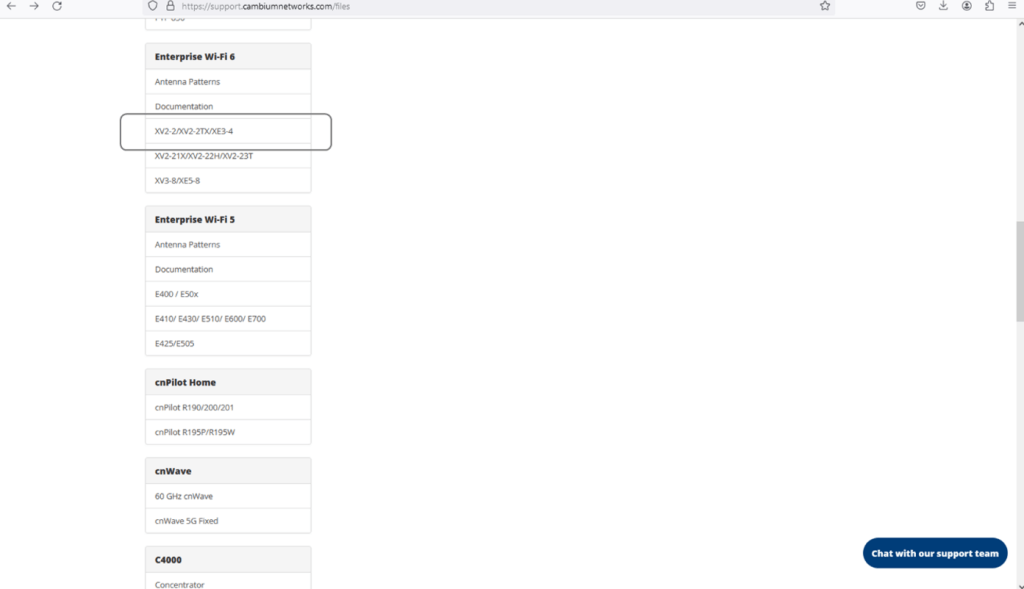
Step 3: Select in Enterprise Wi-Fi 6 and choose XV2-2/XV2-2TX/XE3-4. Download the latest version of the software (file ending with. cimg)
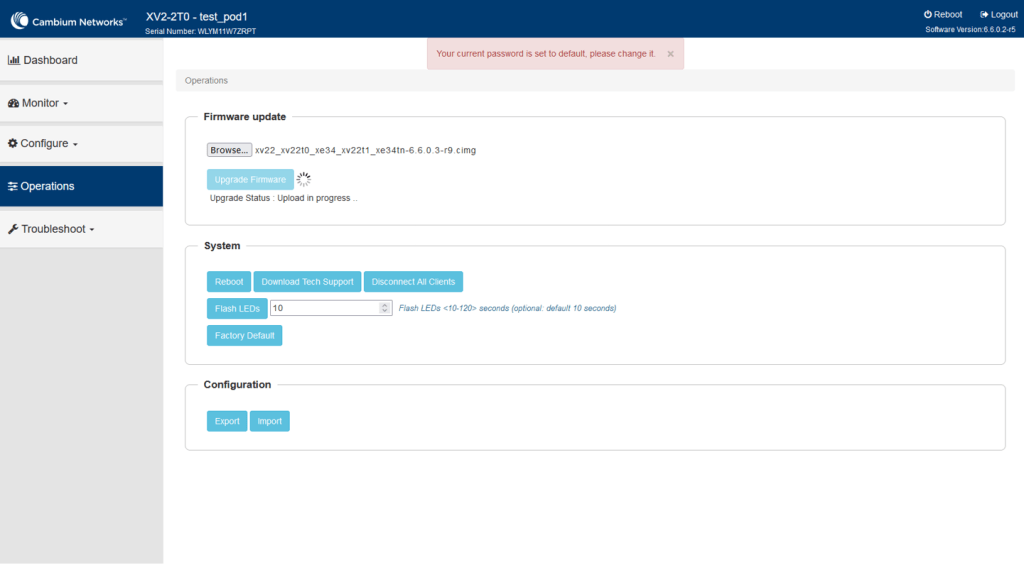
Step 4: In Cambium equipment page (same place you configured the equipment), click Operations. Click in Browse and select the downloaded file. Once you read the filename besides the browse button, click in the “Update Firmware” button and the process will start.

Step 5: Once the Upgrade firmware commences, wait for the device to request the reboot. Do not turn off the device. During the process, you will see the icon changing beside the Update Firmware button and messages on the screen.
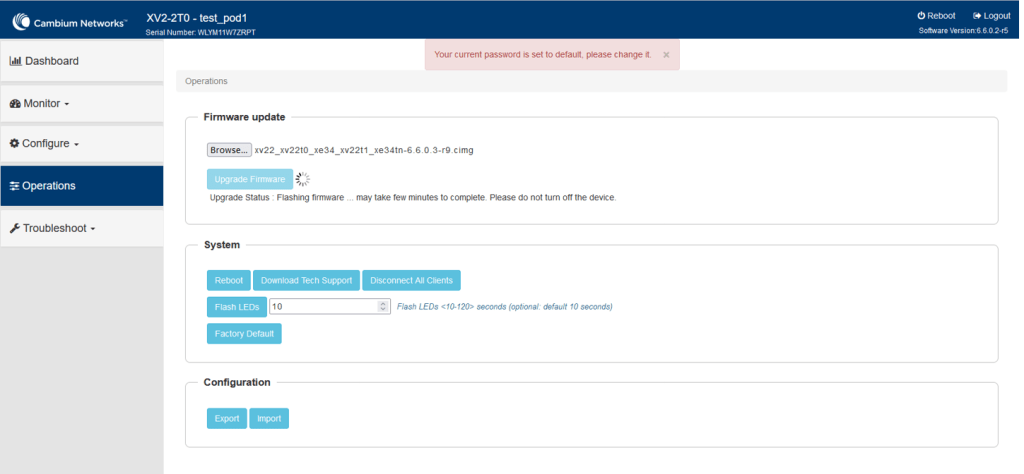
Step 6: System will flash the new firmware. It may take a while. Please do not turn off the equipment.
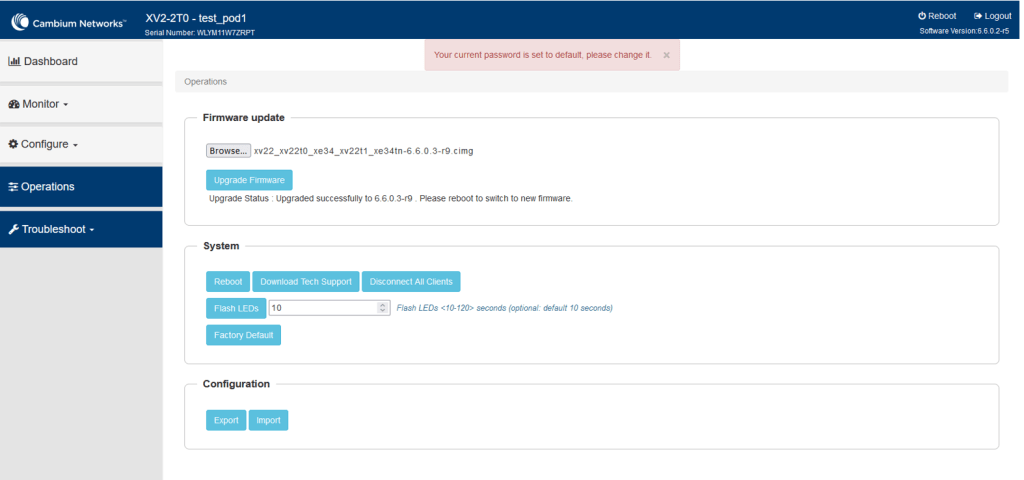
Step 7: click in Reboot and after a couple of minutes the device will be running with the new firmware version and you can log in.

Leave a comment